
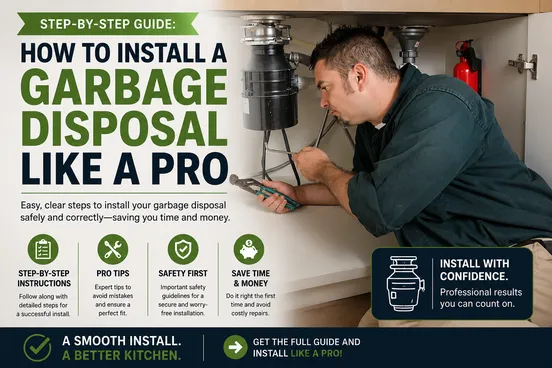
A garbage disposal makes kitchen cleanup faster, keeps food scraps out of the trash can where they smell and draw pests, and is one of the more approachable plumbing upgrades for a confident DIYer. It also combines plumbing, electrical work and a heavy appliance hanging from your sink, so a careless install can leak, trip breakers or create a real shock hazard.
This guide walks homeowners, landlords and contractors through the whole job: choosing the right unit, gathering tools, preparing safely, installing and connecting the disposal, testing it, fixing common problems and keeping it running. If you would rather leave it to a licensed plumber, our garbage disposal installation team can handle it from start to finish.
Before you start, make sure that:
- There is a switched outlet or a hardwired electrical box under the sink, or you have an electrician lined up to add one.
- The new unit fits the space under your sink, with room for the drain and dishwasher connections.
- You can turn off the circuit at the breaker and confirm it is dead with a tester.
- If your home is on a septic system, the disposal you choose is suitable for septic use.
Choosing the Right Garbage Disposal
Continuous Feed or Batch Feed
Continuous feed disposals are the most common. You turn on the water, flip a wall switch and feed scraps in while the unit runs. Batch feed disposals only run when a special stopper is locked in place, so nothing can be dropped in, and no hand can reach in, while the blades are turning. That makes them a good choice for homes with young children. They also do not need a wall switch, which helps when adding one would mean opening up walls.
Horsepower
Disposals generally range from 1/3 to 1 horsepower. A 1/3 horsepower unit suits light use, while 1/2 to 3/4 horsepower covers most family kitchens. Busier settings such as office break rooms and food service often call for 3/4 to 1 horsepower. More power grinds tougher scraps more finely and is less likely to jam, but larger units are heavier and take up more room under the sink.
Noise, Features and Size
Sound insulation and anti-vibration mounts make a noticeable difference in open-plan kitchens. Other features to look for include auto-reverse grinding, overload protection and corrosion-resistant grinding parts. Measure the space under the sink before you buy. Compact models fit tight cabinets, and higher-horsepower units may need a dedicated circuit. Contractors should check local code and any building or HOA requirements before recommending a model to a client.
Tools and Materials
Tools:
- Adjustable wrenches and channel-lock pliers
- Flathead and Phillips screwdrivers
- Needle-nose pliers and wire strippers
- A non-contact voltage tester or multimeter
- A hammer and screwdriver or punch for the dishwasher knockout
- A putty knife, a flashlight or headlamp, and a bucket
- A hacksaw or PVC cutter if the drain pipes need to be shortened
Materials:
- The disposal, with its mounting assembly and discharge tube
- A power cord kit rated for the unit, unless one is pre-attached or the unit will be hardwired
- Plumber's putty, or silicone if your sink manufacturer calls for it
- Wire nuts and electrical tape
- Thread seal tape, plus spare slip nuts, washers and PVC fittings in case the drain needs to be reworked
- A hose clamp for the dishwasher drain line
Safety glasses and work gloves protect you from debris and sharp edges. A knee pad, a magnetic parts tray and a shop vacuum make the work under the sink easier. Keep the disposal wrench that comes with most units; you will need it to clear jams later.
Preparing for Installation
Shut Off Power and Water
Turn off the circuit that feeds the disposal at the breaker panel. The wall switch alone is not enough. Confirm the outlet or wires are dead with your tester. Close the hot and cold supply valves under the sink and run the faucet briefly to drain the lines. On commercial jobs, follow lockout/tagout procedures and coordinate downtime with the facility manager so staff know the sink will be out of service.
Clear and Protect the Workspace
Empty the sink cabinet, lay down towels or a drop cloth, and set a bucket under the trap to catch water. Good light is essential in that cramped space. Keep your hands dry and never handle wiring while standing in water.
Inspect the Existing Plumbing
Look over the drain pipes, trap and shutoff valves for corrosion or damage. Old, brittle pipes often crack when disturbed, so replace them now rather than after they leak. Note where the dishwasher drain hose connects, and check that the disposal outlet will line up with the trap. Some installs need the drain lowered or reworked to fit.
Permits and Codes
Some jurisdictions require a permit for disposal installations, especially in commercial buildings or when new wiring is involved. Landlords and property managers should also check lease terms and building rules before adding or replacing a unit.
Step-by-Step Installation
Step 1: Remove the Old Disposal or Sink Strainer
If you are replacing a disposal, unplug it or disconnect the wires at the junction box after confirming the power is off. Disconnect the dishwasher hose and loosen the slip nut on the discharge pipe. Support the unit from below, because disposals are heavier than they look, and turn the lower mounting ring counterclockwise until the unit drops free. If there was no disposal, unscrew the large locknut under the sink and lift out the strainer basket.
Step 2: Install the Sink Flange and Mounting Assembly
Scrape away old putty and clean the drain opening. Roll a rope of plumber's putty, press it around the underside of the new sink flange, and push the flange firmly into the drain opening from above. Set something heavy in the sink to hold the flange in place while you work below.
Underneath, slide on the fiber gasket, backup flange and mounting ring, then snap the retaining ring into its groove on the flange. Tighten the mounting screws a little at a time, alternating between them, until the assembly is firm and even. Wipe off the putty that squeezes out around the flange in the sink.
Step 3: Make the Electrical Connection
Before hanging the unit, remove the electrical cover plate on its bottom. For a cord-and-plug setup, attach the power cord kit: black to black (hot), white to white (neutral), and the green or bare copper wire to the green ground screw. Secure each splice with a wire nut, wrap it with electrical tape, tuck the wires in and replace the cover plate. Hardwired installs connect the house wiring the same way through a cable clamp. If you are not comfortable with electrical work, or if a new circuit or switch is needed, bring in a licensed electrician or plumber.
Safety note: never work on disposal wiring with the circuit live, and never skip the ground connection. A metal appliance sitting in a wet cabinet must be grounded.
Step 4: Hang the Disposal
Lift the disposal into place, with a helper if needed, and line up the three mounting tabs with the ramps on the mounting ring. Turn the lower ring clockwise until it locks. Hold off on the final tightening until the drain is lined up. Once it is locked, the unit should hang level and not wobble when you tug on it.
Step 5: Connect the Drain and Dishwasher
Attach the discharge tube to the side of the disposal with its gasket and flange, then connect it to the trap. Cut the tailpiece or trap arm if needed so everything lines up without forcing it; strain on the discharge tube leads to leaks and vibration. Tighten slip nuts by hand plus about a quarter turn.
If you have a dishwasher, use a screwdriver or punch and a hammer to knock out the plug inside the disposal's dishwasher inlet, and then fish the loose plug out of the grinding chamber. Forgetting this step is one of the most common reasons a dishwasher will not drain after a new disposal goes in. Slide the dishwasher hose over the inlet and secure it with a hose clamp. Many local codes require an air gap or a high loop in that hose to keep dirty sink water from siphoning back into the dishwasher.
Step 6: Final Tightening
Once the drain lines up, use the disposal wrench or a screwdriver in the mounting lugs to turn the ring until it locks fully. Check every connection one more time before testing.
Testing Your Installation
- Leak test first: with the power still off, put the stopper in, fill the sink partway, then pull the stopper and let it drain. Watch the flange, the mounting ring, the discharge tube and the trap with a flashlight. Run water for several more minutes and feel for dampness, since small leaks often show up as a wet surface rather than a drip.
- Power test: restore the breaker, run cold water and switch on the disposal. It should start right away with a steady hum. Grinding or rattling usually means something, often the knockout plug or a dropped screw, is in the chamber.
- Grind test: feed in a few soft scraps with the cold water running to confirm it grinds and drains properly.
- Dishwasher test: run a short dishwasher cycle and confirm it drains without backing up or leaking at the hose.
Troubleshooting Common Problems
It Will Not Start
Press the red reset button on the bottom of the unit. It trips when the motor overheats or meets too much resistance. Then check the breaker, the wall switch and any GFCI outlet that may need resetting. If the reset button trips again right away, the unit is likely jammed or has a wiring fault. A loose wire nut can cause intermittent operation and, worse, arcing, so recheck the connections with the power off.
It Hums but Does Not Grind
Turn off the power. Insert the disposal wrench, or a hex key, into the socket on the bottom center of the unit and work it back and forth to free the flywheel. Remove any debris with tongs or pliers. Never put your hand in the disposal. Press the reset button and try again.
It Leaks
- At the sink flange: the putty seal is incomplete or the mounting screws are uneven. Remove the unit and reset the flange with fresh putty.
- At the discharge tube: the gasket is missing or pinched, or the tube is under strain. Realign it and tighten moderately.
- At the dishwasher inlet: the hose clamp is loose or the hose is cracked.
- From the body of the unit: internal seals have failed, which usually means the disposal needs to be replaced.
It Vibrates, Is Noisy or Drains Slowly
Excessive vibration usually points to a mounting ring that is not fully locked or a discharge tube pulling the unit off level. Bits of putty or metal left from the install can also rattle in the chamber. If the disposal runs but water backs up, the blockage is usually in the trap or drain line beyond it. Clear the trap, and if the line stays slow, it may need professional drain cleaning.
Maintenance Tips
Everyday Use
Run cold water before, during and for a little while after grinding. Cold water keeps fats firm so they are chopped up and flushed away instead of coating the chamber and pipes. Feed scraps gradually, and cut large pieces down first.
Regular Cleaning
- Grind a handful of ice cubes, or ice and coarse salt, to knock buildup off the grinding parts.
- Pour in baking soda followed by white vinegar, let it foam for a few minutes, then flush with water.
- Grind a few citrus peels to freshen odors.
- Scrub the underside of the rubber splash guard, where grime collects.
Commercial and office kitchens see far heavier use and benefit from daily cleaning and a regular inspection schedule.
What Not to Put Down the Disposal
- Grease, oil and fat, which harden in the pipes and cause clogs further down
- Fibrous scraps such as celery, corn husks, onion skins and artichoke leaves, which wrap around the grinding parts
- Bones, fruit pits and shells
- Coffee grounds, pasta and rice in quantity, which can pack into a paste in the trap
- Anything that is not food
Warning Signs
Pay attention to new noises, slower grinding, persistent odors, frequent jams or a reset button that trips often. Water leaking from the bottom of the unit, or problems that keep coming back after the basic fixes above, usually mean it is time for a professional to decide whether repair or replacement makes more sense.
When to Call a Professional
Plenty of homeowners install a disposal successfully. Hand the job to a licensed plumber when:
- There is no outlet or switch under the sink, or the unit needs a new or dedicated circuit.
- The drain has to be lowered or re-piped, or the existing pipes are old and corroded.
- Leaks or electrical problems continue after you have tried the fixes above.
- The kitchen is in a rental, a multi-unit building or a commercial space where permits, code compliance and downtime matter.
- A mistake has already caused an active leak or electrical problem. For that, call our emergency plumbing line, which takes calls 24/7.
For a closer look at the trade-offs, read why professional garbage disposal installation is worth it.
Want it done right the first time? TK Plumbing is a licensed, insured, family-run plumbing contractor in Sarasota. We install, repair and replace disposals for homeowners, property managers and businesses. Learn more about our garbage disposal installation and repair service, or our commercial plumbing work for restaurants and offices.
Call 941-392-3846 or contact us online for a written quote.